The Mass Production Array is the second sector in Pragmata, and it has six blocks: Test Site Entrance, Shopping District, Side Alley, Business District, Lim Recycling Factory, and Comms Tower.
In this walkthrough, we’ll be guiding you through the Mass Production Array, while also 100%-ing the sector. This means you’ll find all the safe boxes, pure lunum, mods, cartridge holders, and REMs. We will lead you to some of the upgrade components and Mini Cabin figures along the way, but, as they don’t count toward the sector’s progress, we will be skipping a few along the way. Instead, please check out our Mass Production Array upgrade component locations guide and Mini Cabin figure locations guide.
Here’s how to complete the Mass Production Array in Pragmata and 100% the sector.
[Ed. note: This guide contains spoilers for Pragmata, so continue at your own risk! Feel free to follow along or bookmark this page and come back if you get stuck.]
Test Site Entrance walkthrough in Pragmata
After you take the tram to the Mass Production Array, you’ll end up at the Test Site Entrance. If you immediately head to the right, you can find an upgrade component. Head into the next room and defeat a new ball-type robot that rolls around. Grab the upgrade component in the far corner of the room, and start moving on to the next section.
Feel free to head to the right to grab a file and a holo, but continue left to progress in the story. Defeat the walker that comes out of the room, and make sure to grab the file and upgrade component inside before you follow the path into the city.
To move onto the next objective, you need to walk to the end of the road, but there are a few upgrade components found in the alley and road, so make sure to grab those.
After you get to the end of the road, hack the beacon that pops up from the ground, leaving six more to find. Head to the Area 2 gate, which is just behind you, and hack the door to get to the second block, Shopping District.
At this point, you’ll be at a whopping 2% complete, but, just like the Solar Power Plant, you’ll need the ability to get rid of the lunafilament spikes.

Unlock the escape hatch just ahead, and upgrade your equipment (if you’d like to). Follow the path to find a red gate, which you can open using the red gate key from Cabin’s Stamp Club. If you didn’t choose the red gate key, there will be one coming up shortly, but make sure to grab the red gate key from Cabin when you can.
Open the red gate, and head inside to face off against a swarm of enemies. Including the first lone walker, there will be three waves of enemies. If you have your Overdrive Protocol ready, hold it until the last wave because there will be a lot of robots in a small confined space. After you’ve defeated them all, open the chest to get a pure lunum, which can be used to unlock and upgrade abilities back in the Shelter.

Exit the danger area and follow the path to find a riot blaster on the floor. The door in front of you will close and a few enemies will spawn behind you. Defeat them to unlock the door, where you’ll find another red gate key in a briefcase.

Hack the terminal on the wall, step onto the platform, and hack it again to get to the next floor. Defeat the enemy in your way and continue onward.

In the next room, face away from the mannequins to find an upgrade component on the right and an elevator and a path leading to a chest on your left. Ignore the elevator for now and head toward the chest.

Lasers will start to come down the path, but your goal is the indent in the left wall as you cannot get over the wall in front of the safe box. Avoid the lasers and defeat the walker that comes out. Go up the elevator and drop to the chest, which contains the Extended Breach mod. Hack the power terminal on the wall to turn off the lasers, hop over the wall, and follow the path back to the initial elevator.

Ride it to the top where you can find a Mini Cabin figure on top of the brick wall. Follow the path ahead where you’ll find a multihack node. Don’t go outside just yet, but instead follow the path behind the multihack node. Defeat the three walkers and open the safe box for some lunafilament.
Head outside, drop down and grab the upgrade component behind you. Continue to drop off of the blue edge of the platform to avoid falling all the way back to the mannequins until you reach the next beacon. However, before you can hack it, two flying robots and two rolling robots will appear. Use the beacon’s base to avoid line of sight and take down the enemies one-by-one. Once they’ve been defeated, hack the terminal and head into the next room. Inside, you’ll find a file, a safe box containing two upgrade components and a chest containing a pure lunum.

Go up the stairs, but don’t go through the door just yet. Instead, climb the boxes and interact with the wall, revealing it as a holo-wall. By the entrance, you’ll find a file. Continue to the end of the room to find a few enemies and a safe box. Defeat them, open the safe box, and hack the terminal to remove the lasers at the entrance.
Return to the door and grab the upgrade component ahead. Continue following the path where you’ll find an upgrade component and a safe box blocked by lasers. Shortly down the path, a walker disguising itself as a mannequin will jump out. Defeat it and take and immediate right.

Hop onto the dumpster and onto the platform to find a hackable terminal, which will deactivate the lasers blocking the safe box. Hack it, drop down, and open the safe box, which has a cabin token inside.

Continue ahead into the next room, and jump over the boxes on your left to find a Basketball REM. Follow the path, defeat the two walkers disguised as mannequins, and head into the next room where you’ll find a blue chest containing the Close Quarters mod, a file, and an email.
At this point, the Mass Production Array should be 25% complete, but the other two safe boxes in the area are locked behind lunafilament clusters. Head outside, which will take you to the Test Site Entrance, but you’ll shortly end up in the Side Alley block.
Side Alley walkthrough in Pragmata
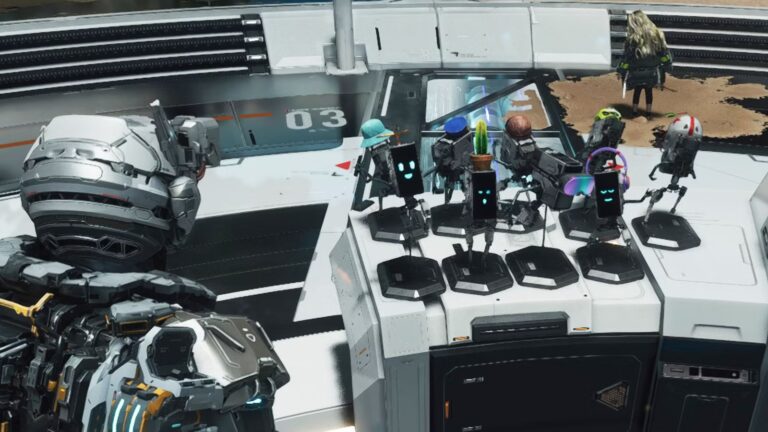
Hack the terminal to 3D print a bridge, and cross it to find an escape hatch. This is a great time to go back to the Shelter to use your Cabin Token, upgrade your gear, adjust your loadout, and gift Diana another REM.

Once you’re ready, return to the Side Alley and drop off the blue edge ahead of you. Pick up the charge piercer attack unit and go through the door where you’ll find two flying enemies and a huge walker, which are officially called executors.

The big walker will occasionally shield itself from hacks by covering its face with four red squares. To hack it, shoot the squares, with each square unlocking its respective quadrant on the hacking grid.

After you’ve defeated them, hack the terminal on the wall and start making your way across the platforms. Defeat the flying enemy on the way up and make sure to look for a blue chest on your right, just beside a fence. Use your thrusters to reach it to get a Relay Amplifier mod. Return to the platform by dashing midair, defeat the enemy ahead, and continue to jump across the platforms.

In this next area, rather than jumping across the platforms, drop into the area below, which has a few rolling enemies and a couple walkers. Defeat them and open the blue chest in the middle of the area to get the Long-Range Targeting mod. Hack the door nearby, which will allow you to go back to the quickly go back to the escape hatch. You can return to the Shelter if you’d like, but don’t forget that it also respawns all the enemies nearby.

Face away from the door and head up the ramp. In the alleyway ahead, there’s a floating blue orb, officially called a sweeper bot, that you can hack, but, it’s extremely quick, making the hack difficult to complete in time before it gets away. If you want to hack it now, we recommend going back to the Shelter and equipping the Long-Range Targeting mod. This will respawn the enemies, but it’ll make it a bit easier. The sweeper bot will go around the entire room and slow down in the corners of the area, which is the prime time to hack it, before it goes back into the alleyway and disappears. Remember, your hack progress will stay as long as you don’t hit any of the red or grey nodes. Try to take your time, so you don’t reset your progress. If you complete the hack, you’ll get a bunch of lunafilament. However, we’re currently unsure if the sweeper will respawn if you fail.

In the same alleyway that you found the sweeper bot, take the elevator up to find the Slide REM.

Now, go back to the initial position (before you dropped into the middle) by taking the elevator in the corner of the area. Jump across the platforms, where you’ll meet a new type of flying enemy that shoots hackable rockets. Hack the rockets to send them back to the enemy to deal a bunch of damage. Defeat them and continue across the platforms until you make it to the top of the spire. Hack the beacon at the top, leaving three more.

Turn to the left of the beacon to find another platform. Float your way across and climb onto the rooftop where you’ll find an elevator and an upgrade component. Go up the elevator, but don’t go inside the room just yet. Instead, turn to the left where you’ll see a Mini Cabin figure on the truck protruding out of the wall and a safe box on the truck below it. Open the safe box to get a cabin coin, and take the elevator back up to the top.

Inside, you’ll find a holo that teaches Diana about eating food. Continue ahead, but be warned that the next area will feature a swarm of enemies. Drop onto the platform on the right and pick up the multihack node as there will be a lot of incoming enemies. There will be two waves. We recommend defeating the flying enemies first and saving your Overdrive Protocol for the second wave to deal with the pesky huge walker. After they’re dealt with, hack the terminal and continue ahead into the next block.
At this point, this block should be 100% complete and the sector should be at 38%.
Business District walkthrough in Pragmata
After you cross the bridge into the Business District, you’ll enter a room with an escape hatch, an upgrade component, a holo, a file, and a chest containing a pure lunum. Return to the Shelter to upgrade your equipment and give Diana the Slide REM we found earlier.

Once you’re ready to move on, head through the doorway and follow the path to the right. A lunafilament cluster will block the way ahead, but there’s a gap in the fence on the right, allowing you to drop into the area below. At the bottom, you’ll find a safe box with an upgrade component inside, a red gate, a door, and an elevator blocked by huge lunafilament spikes. For now, open the red gate and head inside.
Inside, you’ll encounter three waves of enemies:
- Two rolling enemies and a cluster bot
- Four walkers
- Two executors
One strategy that you can use to easily defeat the enemies is to take advantage of the height. If you climb up and drop down repeatedly, the enemy will attempt to follow you, which means they aren’t trying to attack. While they’re trying to catch up, take free shots on them until you eventually defeat them. We recommend saving your Overdrive Protocol and your other weapons for the last wave as they can be pretty annoying to take down normally. After you’ve defeated them, open the chests in the corner of the room to get the Pocket Refinery mod and a pure lunum.

Head straight out of the danger area and into the door ahead. Continue into the next room where you’ll find a safe box behind a taxi and an elevator. Ride the elevator up and get the cartridge just ahead. If you’d like, you can also hop down to grab a holo on dead filament.

On the wall, there’s a hackable terminal that will adjust the positions of the platforms nearby. First, jump onto the platform, and then quickly hack the terminal and jump onto the next platform. This will take you back to the escape hatch at the beginning of the Business District. Feel free to head back to upgrade your equipment.
Go through the door beside the escape hatch, and, this time, follow the path to the left. At the top, hack the beacon, leaving just one left, and hack the terminal to create a bridge below.

Before you drop onto the bridge, look to the right to spot a safe box on the rooftop below. Use your thrusters to get to the roof and open the safe box to get an upgrade component. From here, go up the wooden ramp and float over to the bridge. Head to the end of the bridge and go inside the door, which will take you to the fifth block.
Lim Recycling Facility walkthrough in Pragmata

Hack the terminal inside to activate the Lim Recycler, which will quickly destroy everything inside and uncover a path. Follow it to find a decoy generator defense unit at the bottom.

Head through the door and go to the opposite end of the room. A bunch of enemies will spawn, but wait for them to get into the yellow squares on the floor before you hack the terminal. Once they’re all inside, hack it to quickly destroy them all. If there are a few stragglers, defeat them like normal and carry on.

At the end of the hallway, there will be a holographic wall on the left. Interact with it to open it up and reveal a safe box and a file.

Go into the other room across the hallway to find a REM of a CRT TV.

Look down and drop into the gap in the rotating lasers, but be prepared to take down an executor at the bottom. Defeat them and go through the elevated door on the wall.

In this room, you’ll find an escape hatch. In the corner of the room, you’ll find a container with a blue tarp on it. Look inside it to find a Mini Cabin figure and then climb on top of it. Get onto the rafters to find an upgrade component and follow the path into the next room to find a safe box with a cabin coin. Hack the terminal to defeat the walkers below and drop down. If there are any straggling walkers, defeat them and head into the next area.

In this room, there’s a ramp covered in lasers. Wait for the lasers to pass and then use your thrusters to dash over the ramp. Hack the terminal and go back up the ramp to grab the safe box.

Head down the ramp into the next room and interact with the machine inside to finally unlock the Lim Eraser, which allows you to destroy the filament masses around the Cradle. In the same room, you can find a holo, an upgrade component, and an email. Destroy the filament in the hallway and drop into the area below.
Go through the door where you can see a lot of robots on the other side of a glass wall and yellow squares on the floor, indicating that there’s a Lim Recycler inside. There will be three waves of enemies:
- A lot of walkers
- Two crushers
- One executor
You can hack the terminal to activate the recycler at any point, but it’s only usable once. We recommend using it on the first as there are a lot of walkers, but you can also use it on the other two waves by first hiding in the room that the walkers came out of and then hacking the terminal once the enemies exit their room.
After you’ve defeated them, hack the final beacon and go up the elevator to end up in the room beside the escape hatch. Destroy the filament and return to the Shelter complete your usual tasks. Additionally, you can also return to Solar Power Plant to get rid of the filament masses and 100% the sector.
Once you’re ready, destroy the filament mass in the corner of the room and head out the door to return to the Test Site Entrance. Head to the wall to make it disappear and interact with the escape hatch. From here, we will move into the Comms Tower, but you’re free to skip ahead to the other sections below and revisit previous areas before you face off the incoming boss.
Comms Tower walkthrough in Pragmata
Walk toward the Comms Tower until a cutscene starts, revealing the Gigantic Bot, this sector’s boss.

The Gigantic Bot functions similarly to the executors with everything just on a bigger scale. First, try to hack as many blue nodes as possible and shoot the blue pods on its head or abdomen, which are the weak spots. As you’re dealing damage, look out for the boss’ arms and dodge just before they’re about to hit the ground.

Throughout the battle, it’ll bring up shields, which you have to destroy in order to hack them. Early on in the fight, it’ll start out with two shields on its shoulders, but it’ll increase to four in different locations as the fight progresses. Additionally, it’ll gain the ability to shoot lasers from its chest. Once the lasers are active, they’ll slowly crawl forward, so dodge to side or sprint away to avoid them.

Around halfway through, the Gigantic Bot will mark locations on the ground, which will spawn lunafilament spikes. Avoid the circles and shoot its exposed belly and shields on its limbs. After you destroy the shields, you can unleash a critical shot to deal a lot of damage.

Once they have about 20% of their health left, they’ll unleash a wave of lunafilament. To dodge the attack, wait in the middle of one of the bars on the floor, and dodge forward just as the wave ahead disappears. The timing can be a bit tricky, but if you do get hit, you’ll only take around 300 damage, so just make sure you can survive one hit.

Immediately after, it’ll create multiple buildings around the area. Use an elevator to climb up to the top of the buildings, and destroy the shields. After you destroy the shields, it’ll go down, allowing you to do a critical shot.
From here, the boss should be nearly dead, so chip away at it until you defeat it. A cutscene will play where they’ll grab you and charge up a laser. However, a hacking grid will open. Avoid the grey nodes and make your way to the green node to successfully defeat the Gigantic Bot.
Pick up the Shelter License Key and head inside the Comms Tower to finish the story section of the Mass Production Array.
After you upgrade the Shelter to level 2, make sure to grab the red gate key from Cabin’s Stamp Club before you head into the next sector, Terra Dome.
Test Site Entrance walkthrough in Pragmata (Part 2)
We first recommend defeating the executors in the area, so you can explore peacefully. Once they’ve been dealt with, destroy the filament in the following locations to find a safe box:

Before you head back to the Shopping District, we recommend upgrading your thrusters as you’ll need to float for quite a bit to reach one of the safe boxes in the area.

Retrace your steps to the lowest platform just above the beacon. If you look to the left of the beacon, you’ll find a filament mass. Sprint jump off of the platform and dash to reach it. Destroy it to find a safe box behind it.
Business District walkthrough in Pragmata (Part 2)
Head back to the Business District by taking the elevator to the left of the Yolo Boutique or just using the escape hatch to Office Space station.

Destroy the filament mass at the end of the path to enter an area full of “Error” signs and an elevator. Ride the elevator down and climb onto the steps ahead of you. In this area, you’ll need to repeatedly hack a terminal on the middle spire to adjust the platforms.

Continue to hack the terminal, move to the next platform, and destroy the filament masses until you reach a safe box.

Jump back to the platform in the middle of the room, and be prepared to quickly hack the terminal and jump to the bus ahead of you.
From here, follow the floating lunafilament toward the next platform and repeat the hacking process until you make it to the top, where you’ll find the Skateboard REM.
For the remaining two safe boxes, you’ll need to, surprise, upgrade your Lim Eraser. At this point, the Mass Production Array should be 94% complete. Now, head to the Terra Dome to progress in the story and return after you’ve upgraded your eraser.